BIT.LY URL SHORTENER USING JQUERY AND AJAX

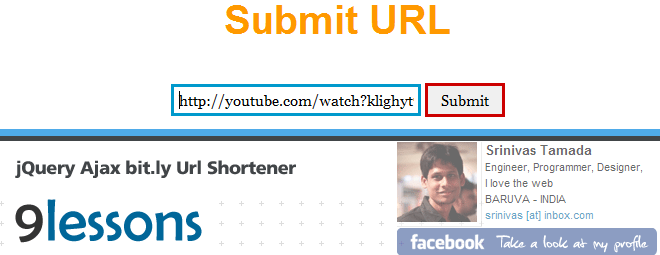
How to create Bit.ly short URLs using Jquery and Ajax. Many tutorials available on web about short URLs using server side script, this script works on client side. It is easy just 5 lines of code calling Bit.ly API. You have to modify the username and API key. Use it and make URLs shorts and neat

Author: Srinivas Tamada

You have to create an account on bit.ly and modify the username and API key.

<script type="text/javascript" src="http://ajax.googleapis.com/
ajax/libs/jquery/1.4.2/jquery.min.js"></script>
<script type="text/javascript">
$(document).ready(function()
{

//bit_url function
function bit_url(url)
{
var url=url;
var username="username"; // bit.ly username
var key="bit.ly API key";
$.ajax({
url:"http://api.bit.ly/v3/shorten",
data:{longUrl:url,apiKey:key,login:username},
dataType:"jsonp",
success:function(v)
{
var bit_url=v.data.url;
$("#result").html('<a href="'+bit_url+'" target="_blank">'+bit_url+'</a>');
}
});
}

$("#short").click(function()
{
var url=$("#url").val();
var urlRegex = /(\b(https?|ftp|file):\/\/[-A-Z0-9+&@#\/%?=~_|!:,.;]*[-A-Z0-9+&@#\/%=~_|])/ig;
var urltest=urlRegex.test(url);
if(urltest)
{
bit_url(url);
}
else
{
alert("Bad URL");
}
});

});
</script>

//HTML Code
<input type="text" name="url" id="url"/>
<input type="submit" id="short" value="Submit"/>
<div id="result"></div>
 Enjoyed this post? Subscribe to our RSS feeds!
Share on Twitter

GOOGLE LIKE CAPTCHA FOR FORMS

Are you looking for Google style CAPTCHA (Human verification code) script for PHP projects, Please take a look at this post. I want to explain how to implement cool-php-captcha script for forms. Use it and add security to your web projects.

How it is done – the form

<form method="post"  action="reg.php">
<b>Name</b><br/>
<input type="text" name="name" /><br/>
<b>Message</b><br/>
<textarea name="message"></textarea><br/>
<img src="captcha.php" id="captcha" /><br/>
<a href="#" onclick="
document.getElementById('captcha').src='captcha.php?'+Math.random();
document.getElementById('captcha-form').focus();"
id="change-image">Not readable? Change text.</a><br/><br/>
<b>Human Test</b><br/>
<input type="text" name="captcha" id="captcha-form" /><br/&gt;
<input type="submit" />
</form>

The reg.php

<?php
session_start();
if (!empty($_REQUEST['captcha']))
{

if (empty($_SESSION['captcha']) || trim(strtolower($_REQUEST['captcha'])) != $_SESSION['captcha'])
{
$note= 'Please enter correct text code';
}

else
{

if($_SERVER["REQUEST_METHOD"] == "POST")
{
$name=htmlentities($_POST['name']);
$message=htmlentities($_POST['message']);
// Insert SQL Statement
$note= 'Values Inserted Successfully';
}

}
unset($_SESSION['captcha']);
}
?>
 Enjoyed this post? Subscribe to our RSS feeds!
Share on Twitter

JQUERY IMAGE LOAD

Found a tutorial about image loading using Jquery written by Remy Sharp while trying to create the same function for company i am working at. Remy has publish the core script and here i will modify it to make it work for multiple images, and load in sequencing order.

Multiple Image Loading

First we create an HTML page which has list element with class “loading” which we’re going to define later in the CSS, the amount of the list element depend on how many images we need to put here, in this example i have 3 images.
Follow up the comments from my previous post about animate loading image with jquery which asking about how to populate images from the DOM instead of declare the image within the javascript codes manualy, so i made a little changes into the code since it seems to be easier for you all to adopt this into your website.

 Enjoyed this post? Subscribe to our RSS feeds!
<ul id="container">
  <li><img src="your_image_url.jpg"></li>
  <li><img src="your_image_url.jpg"></li>
  <li><img src="your_image_url.jpg"></li>
  <li><img src="your_image_url.jpg"></li>
</ul>

The css

ul li {
	width:112px;
    height:112px;
    list-style:none;
}
ul li.loading {
	background: url(spinner.gif) no-repeat center center;
}
#loadnote {
	position:absolute;
    top:0px;
    left:0px;
    background:red;
    padding:10px 15px;
    color:white;
}

The Javascript

$(function () {
	//@ my flicker link
	var flickr_set = 'http://www.flickr.com/photos/87187920@N00/';
	//@ id of div where the loading informations visible
	var _loadDivId = 'loadnote';
	//@ id of the ul container
	var _imgContainerId = 'container';
	//@ style of li loading (spinner image)
	var _imageLoadClassName = 'loading';
	//@ 

SCRIPTY2 THE SUCCESSOR TO SCRIPT.ACULO.US

scripty2 is divided into three parts, core, fx, and ui, and supports IE6+, Safari 3+, Firefox 3+, Chrome, Opera 10 and most WebKit-based browsers. 
Alpha notice: scripty2 is currently in alpha, and not feature-complete. The API is not final and subject to change.

  • scripty2 core

    Core contains various JavaScript and DOM extensions used by scripty2 fx and scripty2 ui, plus developer utility classes.

  • scripty2 fx

    The scripty2 effects framework provides for time-based transformations of DOM elements and arbitrary JavaScript objects. This is at the core of scripty2 and presents a refinement of the visual effects framework of script.aculo.us 1.

  • scripty2 ui


Getting started

  • scripty2 depends on Prototype 1.6.1 or later. For your convenience, a development copy and a minified version of Prototype is included in the distribution.To use scripty2, include this line in your HTML:
    <script src="prototype.scripty2.min.js" type="text/javascript"></script>

    For debugging, you can also include the libraries seperately:

    <script src="prototype.js" type="text/javascript"></script>
    <script src="s2.js" type="text/javascript"></script>

Help & Community

  • Want to discuss? Share feature ideas, problems, suggestions, praise? You’re welcome to do so on the scripty2 Google Group.Found a genuine bug? Please report in detail on our Lighthouse bug tracker..

    Interested in development? Check out the scripty2 repository on Github.

WELCOME FROM … GEOPLUGIN

Small script, showing how to add a welcome to your website visitors.

Demo right below this line

Welcome to our visitors from San Francisco, United States

Code to produce this

<script language="JavaScript" src="http://www.geoplugin.net/javascript.gp" type="text/javascript"></script>
  <h3><img src="/images/waving.gif"><script language="Javascript">
	document.write("Welcome to our visitors from "+geoplugin_city()+", "+geoplugin_countryName());
  </script></h3>

GOOGLEMAP MARKERS JQUERY FROM HTML LIST !

This is one of my favorite jQuery plugins, it has far reaching features. It’s ease of use and implementation means even novices can plot markers on Google Maps with absolute simplistic ease.

How it works

         <script>
           gmap = new GMap2(document.getElementById('map'));
           gmap.setCenter(new GLatLng(0, 0), 13);
           $('#brisbane').gmaplist(gmap);
         </script>

The list element to propgate the markers

<div id="map" style="display:none"></div>
         <ul id="brisbane">
           <li>Redcliffe, QLD</li>
           <li>Cornubia, QLD</li>
           <li>Birkdale, QLD</li>
           <li>Wellington Point, QLD</li>
           <li>Burpengary, QLD</li>
           <li>Jimboomba, QLD</li>
         </ul>
       </div>
 Enjoyed this post? Subscribe to our RSS feeds!

Options

The plugin accepts an options object. The following variables are accepted:

  • delay: The lookup delay in milliseconds.
    Geocoding lookups need to be throttled to prevent 602 errors. The default value of 100ms is typically good enough.
  • loadingGraphic: Path to a loading graphic
    The map is not displayed until all geocoding has been performed. This option is the path to a loading graphic
  • debug: Logs some debugging info to the console
    Currently logs each point result from the Google gatLatLng() hook

TIMEAGO A JQUERY PLUGIN

Timeago is a jQuery plugin that makes it easy to support automatically updating fuzzy timestamps (e.g. “4 minutes ago” or “about 1 day ago”).

The timeAGO jQuery plugin

Timeago was originally built for use with Yarp.com to timestamp comments.

  • Avoid timestamps dated “1 minute ago” even though the page was opened 10 minutes ago; timeago refreshes automatically.
  • You can take full advantage of page caching in your web applications, because the timestamps aren’t calculated on the server.
  • You get to use microformats like the cool kids.
  • Let’s see it working

     Enjoyed this post? Subscribe to our RSS feeds!

THE LEAGUE OF MOVEABLE TYPE – FONTS

We’re done with the tired old fontstacks of yesteryear. Enough with the limitations of the web, we won’t have it. It’s time to raise our standards. Here, you’ll find only the most well-made, free & open-source, @font-face ready fonts.

What its about …

Like any revolution, we aim to make progress, and we need help. If you want to be a part of this free, open-source type movement, you should join us and contribute. If you have any questions about The League or the movement, –
get in touch.
Read Our Manifesto

Some Sample Fonts below

 …

HIGH-RESOLUTION BROWSER ICONS 32 BIT

You may want these for a presentation, a, blog post or for the site featuring your brand new awesome lightbox script (please no!). They are 32bit PNGs, each have their own official shadow treatment, and no background matte color.

Hi-Res Browser Icons in 32 bit

I came across this post today by Paul Irish, and found these ultra high resolution browser icons, you will love.

Have a Jaw Dropping Gander at these

Available in
256×256 256 x 256 browser icon (4)
128×128 128 x 128 browser icon (2)
64×64 64 x 64 browser icon (2)
32×32 32 x 32 browser icon (3)
16×16 16 x 16 browser icon (2)

Original Files and Post on Pauls website…

ROUNDED MENU WITH CSS3 AND JQUERY

In this tutorial we are going to make use of the incredibly awesome rotating and scaling jQuery patch from Zachary Johnson that can be found here. We will create a menu with little icons that will rotate when hovering. Also, we will make the menu item expand and reveal some menu content, like links or a search box.

Similar to the spinner demo button we use

 Enjoyed this post? Subscribe to our RSS feeds!

To make things easier, we created two functions, one for expanding an item and one for collapsing it. The expand function will make the icon rotate 4 times around itself (360 times 4 are 1440). We will also make the item expand by animating an increase in its width. Then, we let the content appear, first the whole div and then the paragraph element.

The collapse function will rotate the icon back, decrease the width of the item and make the content disappear.

Site Help
Privacy Overview

This website uses cookies so that we can provide you with the best user experience possible. Cookie information is stored in your browser and performs functions such as recognising you when you return to our website and helping our team to understand which sections of the website you find most interesting and useful.